Table of Contents
Introduction LUCY Macro Simulation
LUCY can create a phishing campaign that simulates an attack using a malicious Word document file with a macro. The custom Macro with the according campaign settings is compiled during the campaign. Therefore each Word file for each recipient will have different settings.
Available Macro File Templates
LUCY comes with multiple Macro simulations:
- Macro Simulation "Financial Bonus": This Macro simulation will access the command shell of a windows system and execute some commands (can be configured in the according template) and then use the browser to send back the output of those commands. Please note that this type of Macro that tries to access the client's file system is often detected as malicious in antivirus solutions.
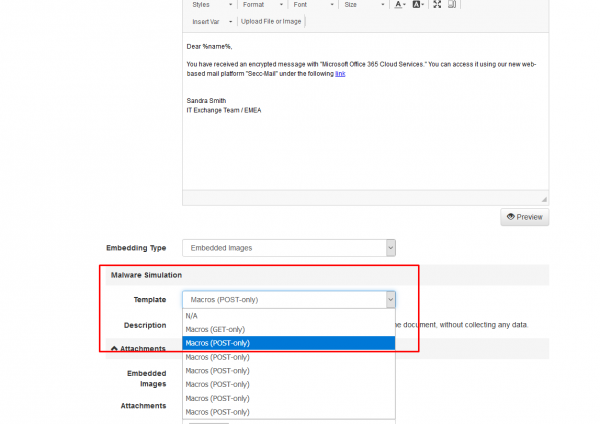
- Macro Simulation "POST ONLY": It will do a simple http or https connection back to LUCY upon opening which will notify the LUCY administrator that the word has been opened and the Macro has been activated. The Macro can be used in any file-based or mixed attack scenarios either as a mail attachment or as a file that can be downloaded from a landing page created by LUCY.
- Macro Simulation "GET ONLY": This Macro simulation is working in LUCY 4.6 and newer. This macros template just pings back to Lucy when the user opens the document, without sending and collecting any data. "Get" template can be an alternative to "Post" request in campaigns where you need to check only the fact of opening a file. Note: In the campaign settings for the "Get" macro, you need to select type "Click" in "Success action" for a correct statistic.
Please note, that those are only two samples. You can create your own template. Please check the tutorial at the bottom of this page.
Configuration
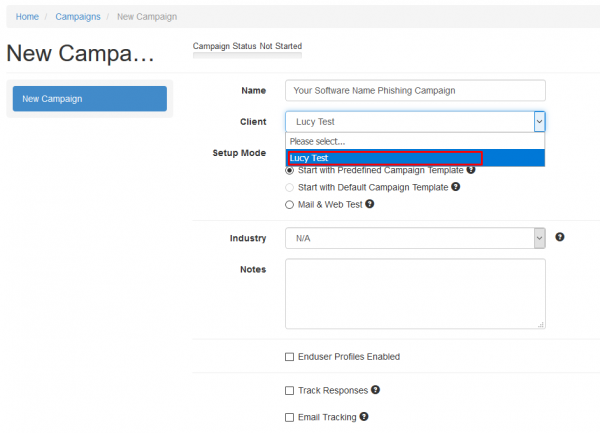
After the login, you can create your first phishing campaign by pressing the button “New campaign”. We recommend using the Setup Wizard when used for the first time.

STEP 2 - Select or Create a Client
Create a client or choose the built in the client (a client can be your own organization or the company who asked you to perform a phishing test). This is important because you can also create view only accounts which are associated with those clients.
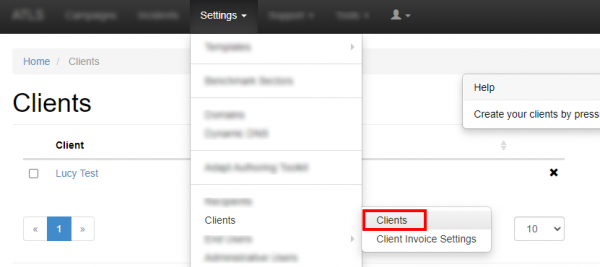
New clients can be created under Settings>Clients.
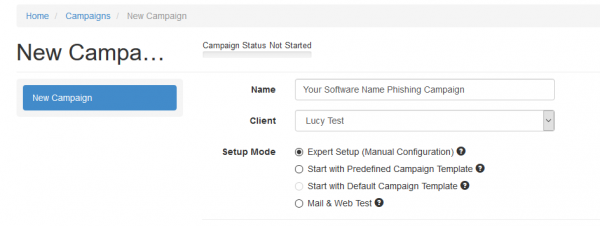
STEP 3 - Choose Your Configuration Mode
You may either continue with the Expert Setup or a Start with predefined campaign Template configuration.
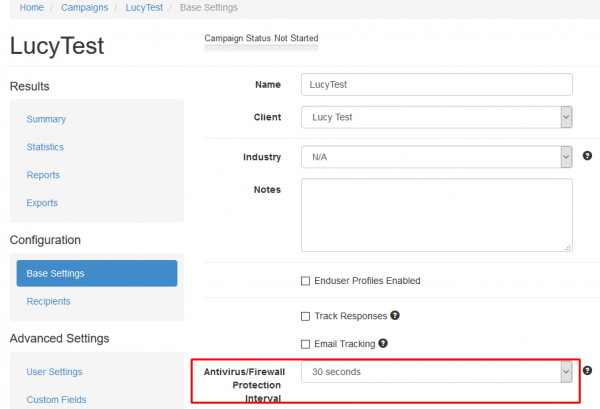
Sometimes a remote Firewall, Spam filter or Virus Filter might automatically scan all the URL's within a link. As a result, you end up with false positives and LUCY will show all link clicked (success). To avoid such automatic link requests by some 3rd party application you can enable the antivirus/firewall protection and LUCY will ignore all GET requests for the first 30 or 60 seconds:
STEP 4 - Select a Phishing Template that supports Macro's
Now you need to select one or multiple phishing scenarios that support Macro's (make sure you have downloaded all the latest scenarios first). Please check out what different scenario types are available. A Macro attack is a file-based attack simulation. Therefore, you can only use the following template types:
- File Based Templates
- Mixed Templates
- Portable Media Attack Template
Most templates will enable you to place the Macro on a landing page from where it can be downloaded. If you only want to send the file as a mail attachment without involving a landing page you can choose the file based scenario "Financial Bonus (Word Macro in email Attachment)":
This is an email only template that will send the users an email with a Word document file attachment that contains a macro. The macro has the ability to execute a list of harmless commands (e.g. "whoami") and send the output back to LUCY using the built in browser (HTTP). The commands can be configured with the email settings. You may also leave a copy of the output on the Desktop of the user (a text file called lucy_results.txt). If you don't wish to leave any traces, you can select "Delete Temporary File" in the Macro options. Please note: at the bottom drop-down menu you can still switch between the different file templates and have the ability to pick a different Macro simulation (e.g. "POST ONLY", which most likely will generate less alerts on a possible AV solution).
For this tutorial, as an example, we select the Mixed Template “Confirmation Social Media Profile ”, where the user will be asked to download a CV that contains a Macro.
Note: If you attach an Office file to an email there is a much higher chance it will get filtered opposite to campaigns, where the Office File has to be downloaded from a web page. The "POST ONLY" Macro has the highest chance of not getting filtered as it is not accessing the local file system from the tested target.
STEP 6 - Configure the Base Settings of Your Campaign
Once you have selected the scenario, you need to configure the Base Settings of the campaign. First, give your campaign a name and then choose how your recipients will be able to access LUCY by defining the Domain. Finding the appropriate domain name is a very important step for the success and it depends very much on your campaign scenario. If you plan to create a fake web mail login you might try to reserve a domain like "webmail-server365.com" and point it to LUCY.
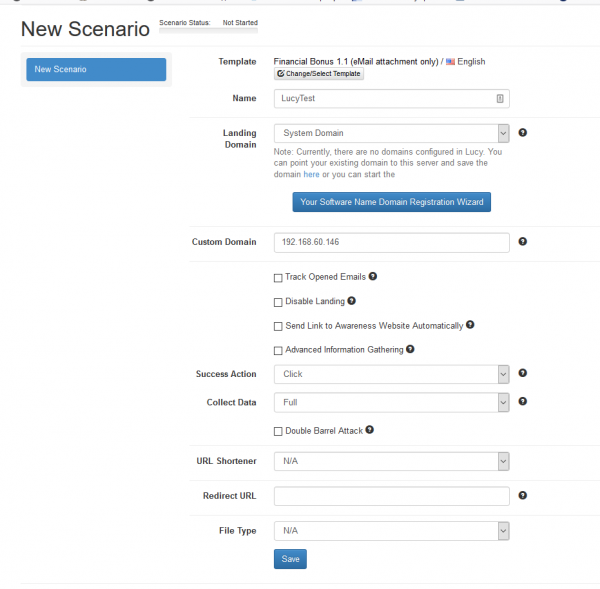
Note: Each scenario has its own Base Settings.
STEP 7 - Configure Basic Settings
There a few Optional Settings that you can apply within the Base Settings. Lucy comes with certain Default Settings. You can change these setting as you like. The settings are:
- Track Opened Emails: Inserts an invisible image into outgoing emails to track if users opened the message. Use this feature carefully, as some email servers may put such emails into the spam folder.
- Disable Landing: Check to disable landing page for this scenario.
- Send Link to Awareness Website Automatically: Send a link to the Awareness Website after the user has been successfully attacked. Please note that the Awareness Website should be published for this feature to work.
- Advanced Information Gathering: Check this option to enable advanced visitor information gathering More details can be found here: Advanced information gathering
- Success Action: Defines what LUCY considers as a successful attack. There are four options.
- Collect Data: Choose "Full" if you want to record all entered logins and passwords, "Partial" to record only the first 3 letters (remaining letters will be masked with asterisks) or "No" to skip user data collection.
- Double Barrel Attack: When using Double Barrel Attack, the system first sends a "Lure" email containing some teaser text. After that, the system waits for a while (you can configure that time in settings below) and sends an actual phishing email. The "Lure" delay defines, in seconds, the time frame between the Lure and the attack emails for a Double-Barrel Attack.
- URL Shortener: When you place the %link% variable within the message body and your scenario uses a public domain name, it will automatically be shortened. The link will look like “http://is.gd/9VjDKF” to fit into one text message. If you use an IP address for your landing page the link will be not shortened.
- Redirect URL: This is used for hyperlink based scenarios or within a landing page to redirect to an awareness page.
- File Type: In this drop-down list you can select the type of file that will be attached to the email.
STEP 8 - Edit your Landing Web Page within Your Campaign
After saving the Base Settings, you can now Edit the Landing Page, Upload Your Own Webpage or simply copy any website on the internet. The Landing Page is the webpage that the users will see when they click on the link in the email they receive. First, select the drop-down menu at the top the page where you want to edit. Please note that the same landing page may be available in different languages. So make sure you edit the correct language.
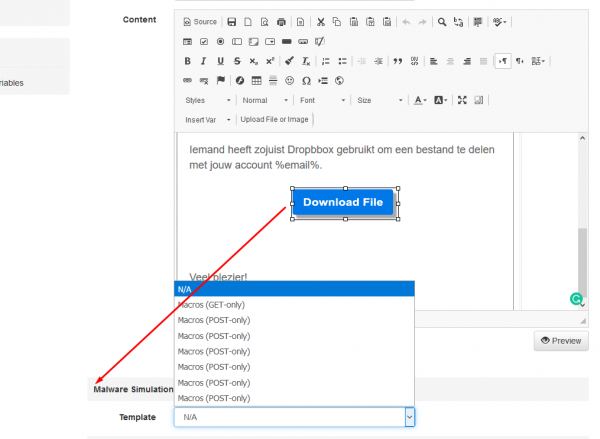
As we want to include a download to a Macro we need to make sure the Macro is selected at the bottom of the configuration page. This drop-down menu will tell LUCY what malware simulation should be attached to the download bottom on this page:
If you save the landing page with the settings displayed in the screenshot above LUCY will create a Word file for each user which can be downloaded from the phishing simulation.
STEP 9 - Configure Message Settings (Email or SMS)
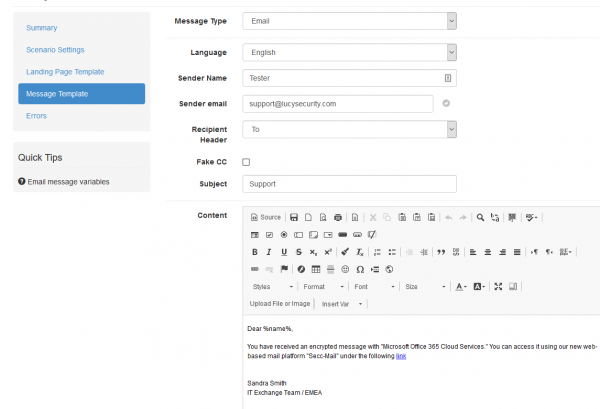
It’s time to setup email communication (if you want you can also use SMS as an alternative). Choose your sender's name, email address and subject. Please also choose the language for each group. If you configured an English landing page, then select English also within that recipient group. If you have different groups with different languages within your company you can simply create a group and select a language for each recipient. LUCY then will direct each user to an individual landing page that matches that language. Please read the Mail Settings Chapter for more configuration options.
Note: The most common reason for emails not arriving at your Recipient's Inbox are SPAM filters. When using a known email domain (e.g. test@microsoft.com) or a non-existing email domain (e.g. test@nonexistant.com) your email might get deleted by SPAM filters. Some public email providers (like Gmail, Hotmail, etc.) are very restrictive concerning possible SPAM emails and might not even forward emails to your Recipient's SPAM folder (based on the emails SPAM reputation). To verify this you can use LUCY's built in SPAM Checker.
STEP 10 - Add recipients
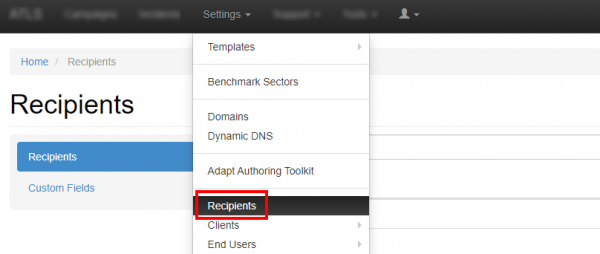
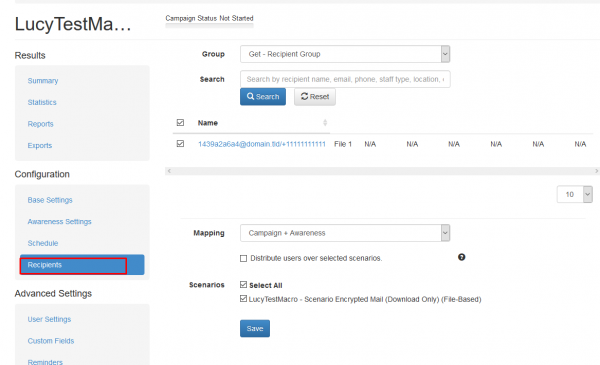
You need to create the Recipients List in the Menu item "Recipients".
This is the list of users that will get the phishing emails. You can add them manually, import a file with all your recipients or even search them on the internet. Once you have created that group, you can select it in your campaign and map them to a specific scenario. You can also define if they should be used only for the Landing Page link, the Awareness site link (e-learning) or both.
Please read the Recipients Settings Chapter for more configuration options.
STEP 11 - Add Scheduling Options to Your Campaign
If you want, you can create a schedule to run the campaign using a delay or customized time delays between campaign phases. If you are new to the system, we'd recommend that you go with the Default Timing Settings and skip this step. Please read the Schedule Settings Chapter for more configuration options.
Step 12 - Add E-learning Content to Your Campaign
There is the option to have LUCY automatically send some e-learning content to all users or only users who have failed the phishing test. This configuration setting is part of an Separate Chapter (E-learning). If you want the users to get an e-mail with a link to the awareness content, you need to make sure that in "STEP 7 - Configure Basic Settings" the checkbox "Send Link to Awareness Website Automatically" is selected and you configured an awareness template (mail and optional landing page). It is also important that you define what you consider as an successful attack because only those who have been successfully tested will receive the mail. If you don't want the e-learning content to be delivered via mail you can also redirect the user directly to a landing page with the awareness content.
Step 13 - Start Your Campaign
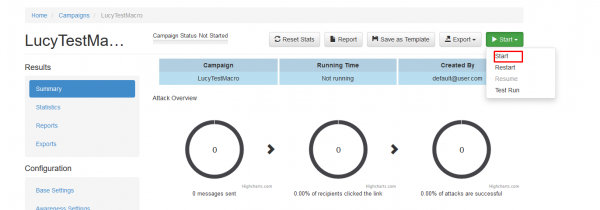
Now you are ready to start. Although we recommend performing a test run with a single recipient before you start attacking all users, additionally it is a good idea to use the LUCY SPAM Checker. Just click “Real Attack” and LUCY will test your settings before starting the campaign. If you want to skip the checks, press "Skip Checks". Your first recipients should receive the emails within seconds. Please read the Start Campaign Settings Page for more configuration options. If you experience any problems with starting/running your campaign, please Consult the Troubleshoot Section first.
Step 14 - Monitor Your Campaign
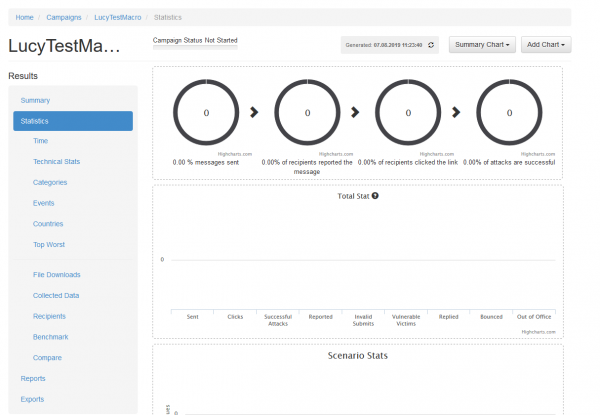
The progress of the campaign can always be monitored in Real-Time. Click "Statistics" within your campaign. Please read the Statistics Chapter for more configuration options.
You will be able to track if the macro has been activated if you enabled the success action as "file data receive". The actual output of the macros can be found within the campaign under statistics/collected data.
Step 15 - Create Reports
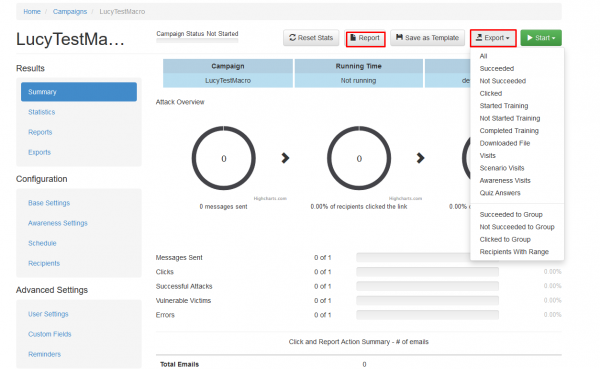
Once you have finished the campaign, you may create different types of reports (PDF, HTML or raw export). Please read the Creating Reports Chapter for more configuration options.
Create Custom Macro templates
You can create your own template in two ways:
- Based on a copy of an existing template
- Create a new template from scratch
Please note - you must use Excel version 2010 or earlier to edit the VBA script, or the macro file will not function properly after saving.
Example: create a copy of an existing template Let's say you want to create a new macro template based on the existing template "info.doc" (POST only) called mydocument.doc, you need to go through the following steps:
- Step 1: Select the template "Macros (POST only)
- Step 2: Press the copy button
- Step 3: Download the "info.doc" from the template and save it locally
- Step 4: Edit the Word File, without enabling the Macro and save it under your new name "mydocument.doc"
- Step 5: Delete the existing file "info.doc" in the template "Macros (Post only) (copy)"
- Step 6: Upload your new file "mydocument.doc" to the template and save the template
Example: create a new template from scratch You can create your own file-based macro templates using any MS office file (ppt, doc, xls…):
- 1) create a VB macro with the main function named AutoOpen
- 2) use all variables you will pass from lucy in this form - "%my_variable%###################" - don't forget to pad the value with "#" symbols, so the string is long enough to hold all possible values (Lucy replaces #s with actual data when running a campaign)
- 3) use %lucy_url% as Lucy URL
- 4) use variables in macro only after you process them with "Clean" function (see attached bas file) - it cleans excess # in the end before using the actual data passed from Lucy
- 5) open word, excel or powerpoint document, go to the developer tab and hit "Edit Macro"
- 6) there choose "AutoOpen" function or create it and press "Edit"
- 7) paste your macro code, save the document and quit
- 8) voila - you have a new evil macro template ready
See attached the macro template you can use for new macro projects
Macro Template for Mac
Existing Macro Templates are more focused on Windows systems. If you want to attack the Mac OS system, please use this file.
